Most projector advice starts with the projector. That is backwards. A smart projector setup is a room problem long before it is a hardware problem, and the people who end up disappointed are almost always the ones who bought the box first and asked about the wall second. I have hung enough of these to know the pattern: a bright room, a white wall, a projector running in Vivid mode, and a picture that looks like a fog bank with subtitles.
The fix is a sequence. Measure the throw, control the light, place the unit so you are not fighting keystone correction, then tune the picture and leave it alone. Do that in the right order and a mid-priced projector looks like a much more expensive one. Do it in the wrong order and a premium projector looks like a toy. I have seen both happen in the same week.
This guide walks through the sequence I use on installs, and it covers the two projectors I would actually start with for a living room and for a backyard.
Why you should trust me
I am Devon, and I have been installing home theater and AV gear for fifteen years, the last several out of Raleigh, North Carolina. I have hung projectors in basements with black velvet on the walls and in rental living rooms where the curtains never quite close. My own theater is a 120-inch screen in the basement with lighting I control by voice, and the first projector I ever bought is still the reason I care this much about ambient light. It could not handle a single lamp. One.
I calibrate with a colorimeter, not my eyes, and I do not quote a brightness number that is not ANSI lumens. That habit has saved clients a lot of money and cost me a few vendor friendships. Worth it.
How I picked and how I tested
I have not run either of the two units below through my meter, and I am not going to pretend otherwise. What I can tell you is the filter I use before I recommend anything, and how these two hold up against it.
The filter has four questions. One: what is the real brightness, in ANSI lumens, and does the brand actually use that word? Two: how does it handle placement, meaning does it focus itself, and does it have a stand that lets you aim it without a ladder? Three: what are you getting for streaming, because a projector with a licensed smart platform is a different product from one with a generic app store that breaks every six months. Four: how does it sound, because audio is the part of a spec sheet nobody reads until the first movie night.
Then the room test. I do not care how a projector looks on a showroom shelf. I care whether it survives a living room at 4 p.m. with a window behind the couch, and whether it survives a backyard at dusk with a string of patio lights on. That is the test, and it is why brightness and light control keep coming back.
What I will not do is quote a contrast ratio off a box. Those numbers are fiction. Real contrast is what your eyes see in your room, after the black level is set properly, and no spec sheet can tell you that.
The two projectors worth starting with
Both units below are aimed at people who want one box that handles the streaming, the sound, and the picture without a rack of gear. One is built for indoors, one is built for the yard, and neither needs a separate streaming stick.
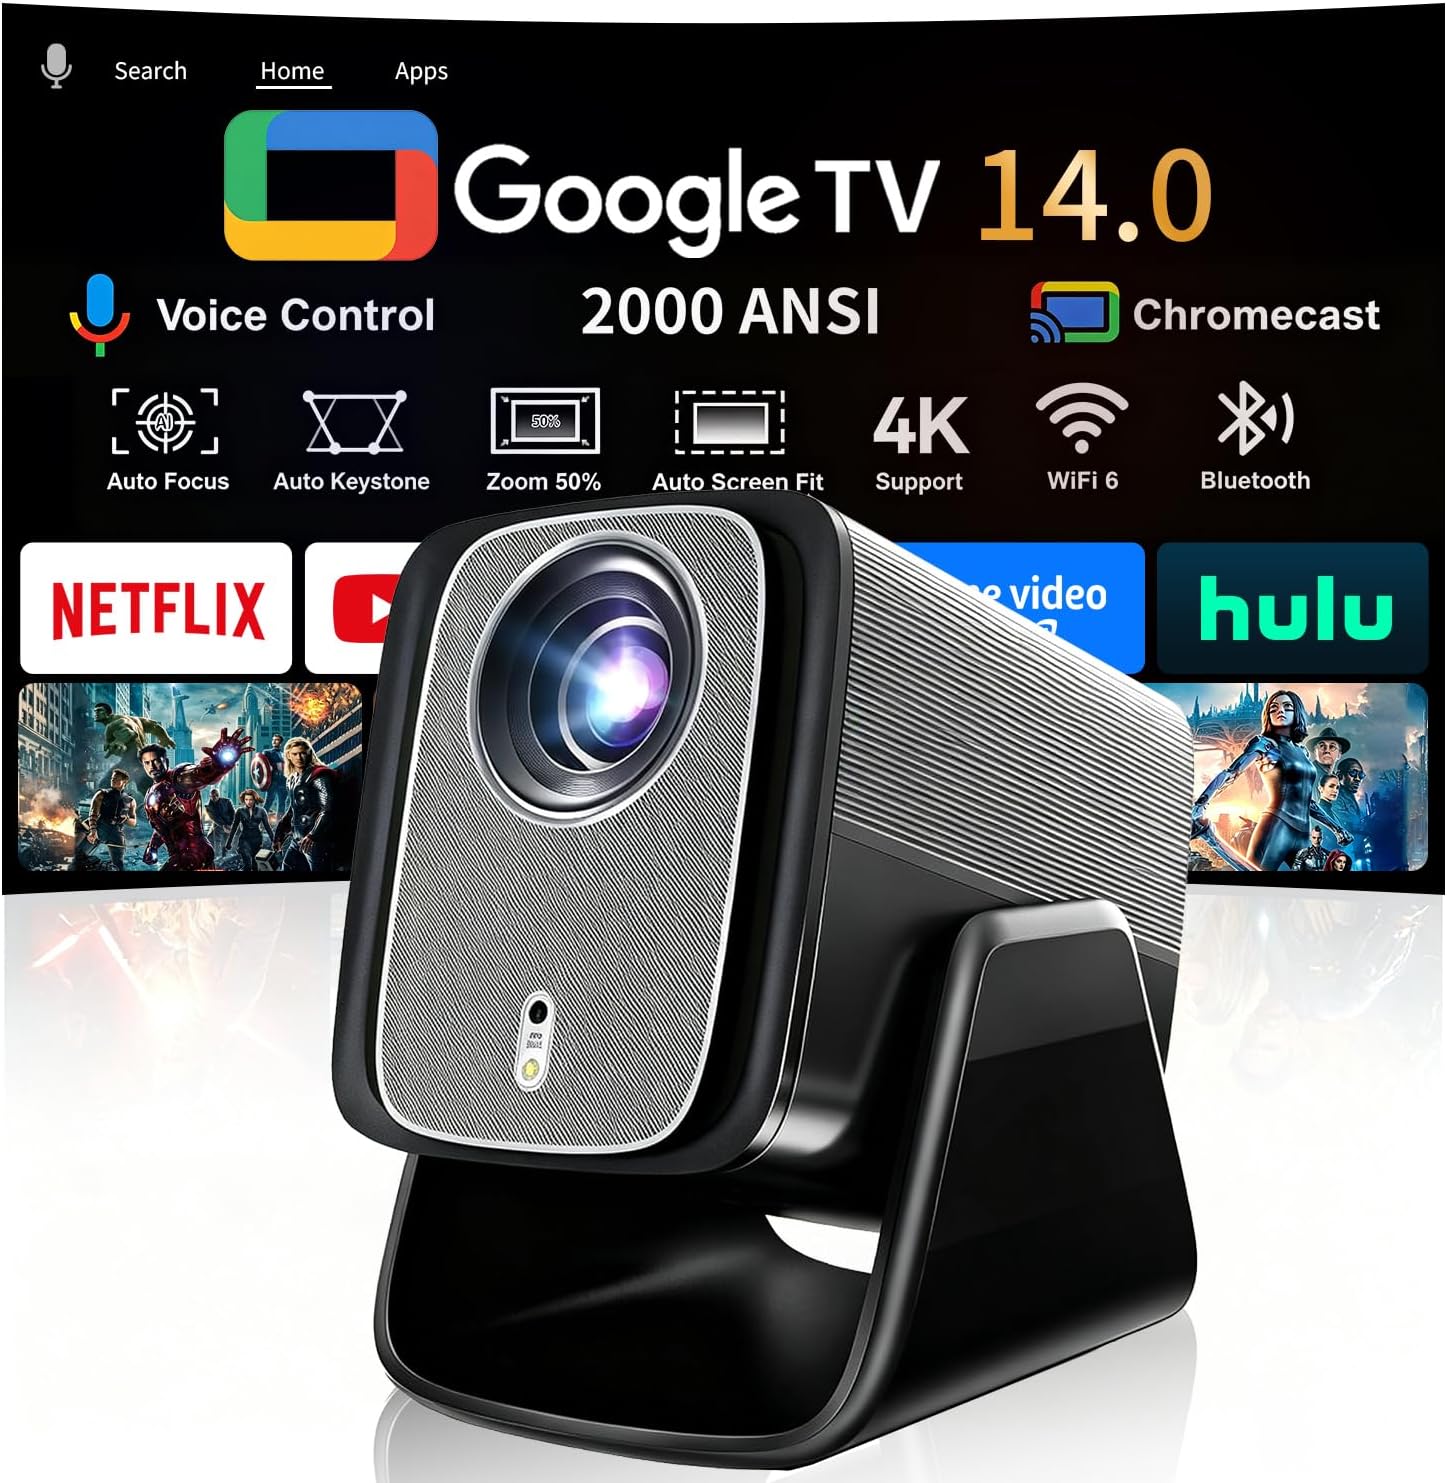
Our pick: Google TV-Licensed Smart Projector with WiFi and Bluetooth, 2000 ANSI Native 1080P Projector, 4K/8K Input Support, Dual 36W Dolby, Auto Focus, 125% sRGB, HDR10, 90° Stand, 200" Display, X5 Pro
 Visit on Amazon →
Start with the number that matters: 2000 ANSI lumens. Not 2000 lumens, not 2000 LED lumens, ANSI. That is the measurement standard, and it is the only brightness figure worth comparing across brands. At 2000 ANSI you have a projector that can hold a picture in a room with some light in it, which is the room most people actually own. You will still want the blinds down for daytime viewing, because nothing at this level beats a sunlit window. You will not need the room pitch black.
The panel is native 1080p with 4K and 8K input support. Read that wording carefully, because it matters: this is a 1080p chip that accepts a higher-resolution signal and downscales it cleanly. That is the honest version of the budget 4K story, and it is fine. A well-tuned 1080p image at 100 inches looks great. What I would not want is a listing claiming 4K UHD without saying what the chip actually is.
The parts I like for a real install are auto focus, the 90-degree stand, and Google TV with licensed apps. Auto focus keeps the image sharp when the projector gets nudged, which happens constantly on a coffee table or shelf. The 90-degree stand means you can point it at a wall or the ceiling without buying a mount on day one, and that is the single most common thing people get wrong when they set up a projector in a bedroom. Google TV licensed means the app store is the real one, so Netflix and YouTube launch the way they do on a television instead of through a browser.
On color you get 125% sRGB coverage and HDR10 support. Both are nice, neither is why you buy this. HDR on a projector without enough light behind it is a suggestion, not a feature. The dual 36W Dolby audio is the spec that will surprise you, because built-in sound is normally the weakest part of a projector. Two 36W drivers in one chassis is enough for a living room movie night without a soundbar, which is a sentence I do not write often.
Flaws but not dealbreakers: native 1080p, so a resolution purist will want to look elsewhere. The 200-inch maximum image is a ceiling, not a target. Sit closer to 100 or 120 inches and the picture is denser and brighter.
Anyone setting up a first projector in a living room, bedroom, or apartment where the wall is the screen should start here. Check current Amazon price.
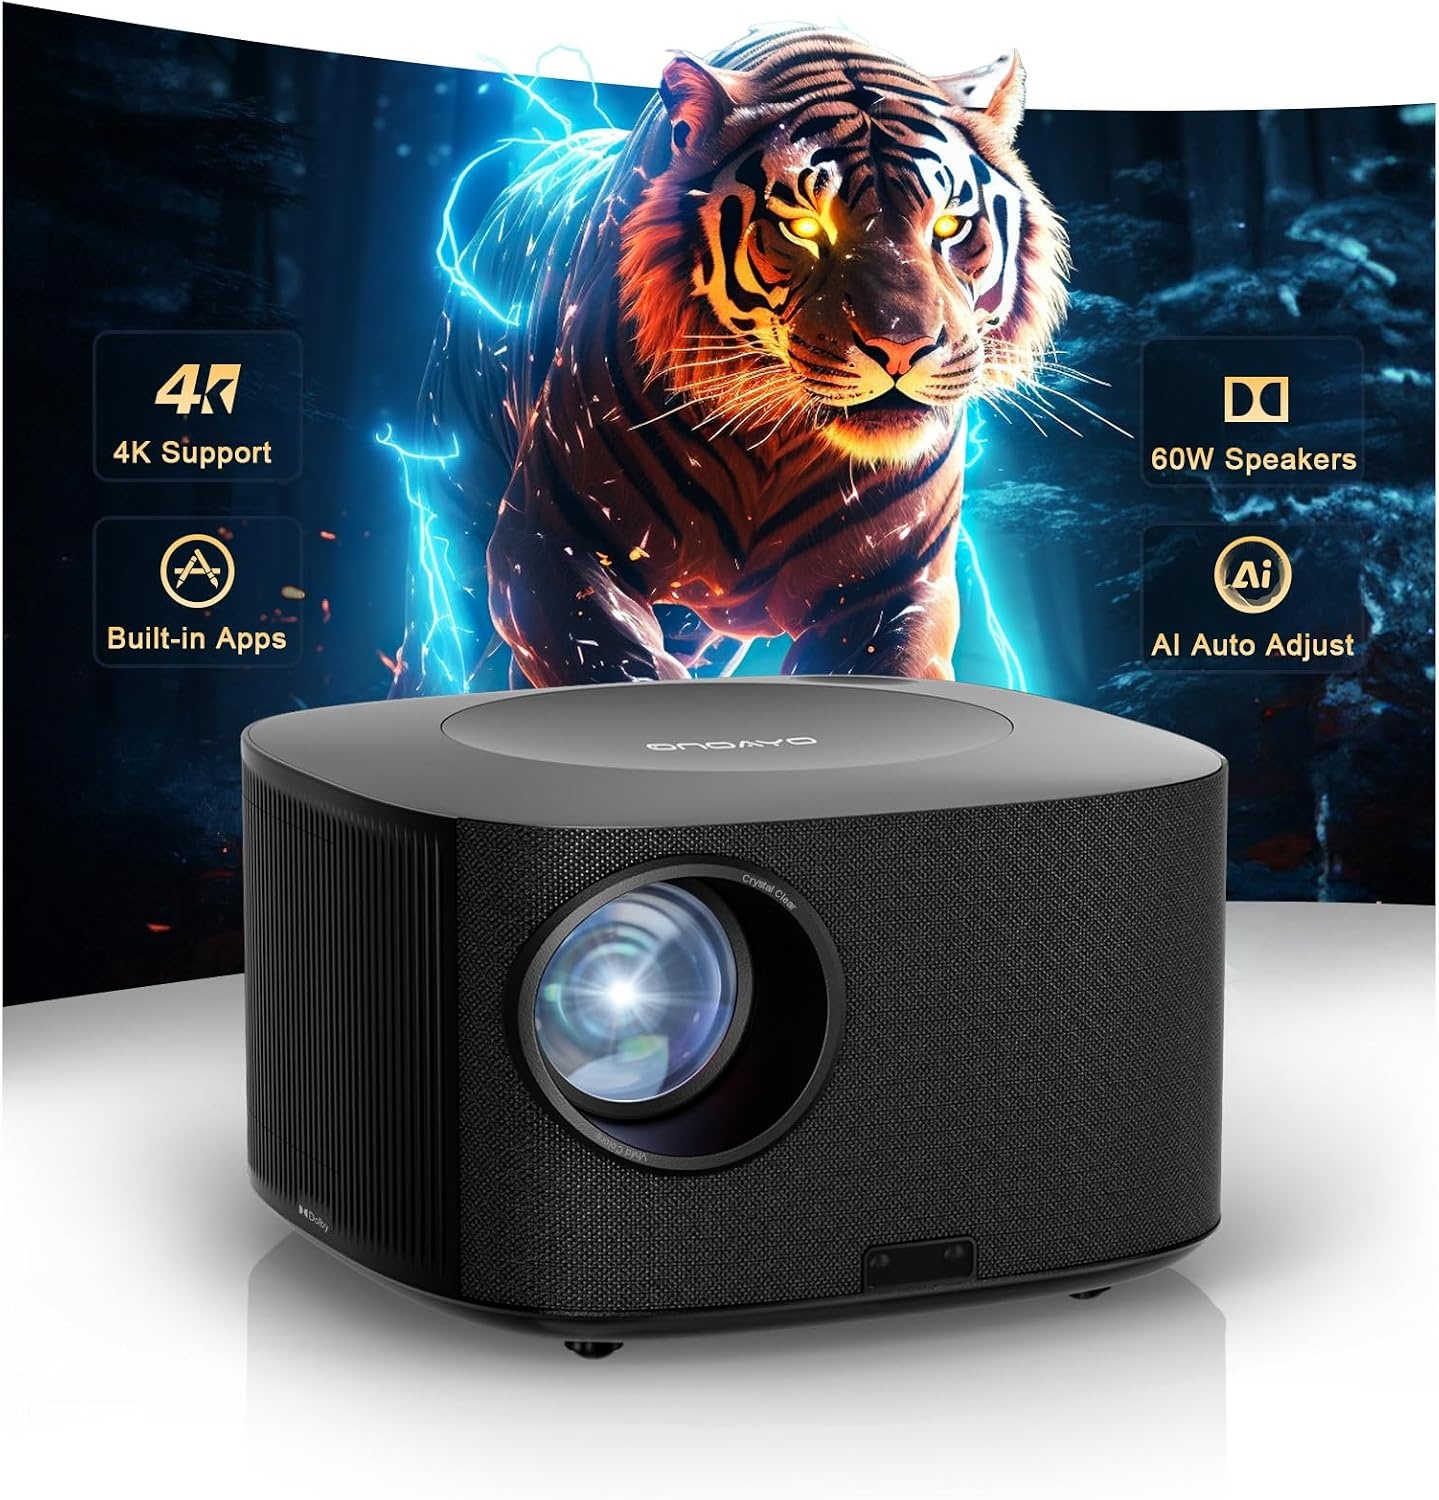
Upgrade pick: ONOAYO Outdoor-Projector-4K with 60W Dolby Audio and Official Licensed Apps
 Visit on Amazon →
This is the one I would point at a backyard. The two specs that make it an outdoor projector rather than an indoor one with a marketing label are the 4K resolution and the 60W Dolby audio. Outside, you have no walls to bounce sound off, so the audio has to do all the work from the chassis. A projector with weak speakers in a yard sounds like a phone call on speaker. 60W of Dolby processing is the difference between "we can hear it" and "that sounds like a movie."
The licensed apps matter just as much outdoors, because that is when you are least likely to have a laptop and an HDMI cable within reach. A licensed platform means you can carry the unit out, plug it in, and be watching something a few minutes later. If you have ever tried to stream from a phone to a generic projector at a cookout while six people waited, you know what that convenience is worth.
Flaws but not dealbreakers: outdoors means ambient light, and no projector wins against the sun. Plan on dusk or later, or bring a screen that rejects light. Treat it as an indoor-safe unit that comes outside with you rather than a permanent patio fixture, unless you are comfortable with what weather does to electronics.
Anyone who hosts in the yard, camps with power, or wants one projector for both the living room and the patio should look here. Check current Amazon price.
Step-by-step: the setup sequence that works
Step one: pick the surface before the projector. Your image is only as good as what you throw it at. A white wall is fine, a light gray wall is better for black level, and a real screen is best if you can hang one. Avoid a wall with texture, a wall with a window on it, or a beige wall with warm paint, which tints the whole picture. Paint color changes your color temperature as surely as a menu setting does.
Step two: measure throw distance. Throw ratio is how many feet of distance you need per foot of image width. A 1.2 ratio means a 100-inch wide image wants about 10 feet of space. Measure the room before you measure the wall. If the projector has to sit 14 feet back and your couch is at 12, the math does not care about your plans. Auto focus can fix a slightly crooked setup, but it cannot fix a projector that is too close or too far for the image size you want.
Step three: get it at screen height, or use the stand. A projector sitting on a coffee table puts the image low. The 90-degree stand on the X5 Pro exists for exactly this: point the unit up at the wall, let auto focus do its job, and you skip the conversation about drilling into a ceiling. If you do mount it, put the lens level with the top or bottom of the screen and use vertical offset rather than the keystone slider. Keystone correction crops and resamples the image. It works, and it costs you sharpness.
Step four: kill the light you can kill. Blackout curtains, blinds, and turning off the lamp behind the couch are free picture quality. This is the step people skip, and it is the single biggest upgrade available to any projector at any price. If you cannot control the room, you need more ANSI lumens. That is the whole equation.
Step five: set the picture mode once. Turn off anything called Vivid, Dynamic, or Auto. Auto brightness is the worst offender: it reads the room and crushes your blacks in a dim room, which is exactly when you want them. Pick Movie or Cinema mode, set color temperature to Warm, turn off motion smoothing, and stop touching it.
Step six: run content you know. Do not judge a projector on a demo clip. Put on a movie you have seen ten times, in a scene you know is dark, and watch the shadow detail. If dark scenes turn to mud, your brightness or black level setting is wrong, not the projector.
Step seven: handle audio. Indoors, try the dual 36W drivers before you buy anything else. Outdoors, the 60W system is doing more work than any soundbar would in that environment, because there are no walls for a soundbar to use either.
Where most setups go wrong
Three failures, in order of frequency.
The first is brightness denial. People buy a projector that is honest about its ANSI lumens, then use it in a room with west-facing windows at 5 p.m., then blame the projector. The projector did its job. The room did not.
The second is keystone abuse. Every click of keystone correction is the projector throwing away pixels to make a rectangle. It is a tool for fixing a small error, not a substitute for placing the unit correctly. If you are at maximum keystone, you have mounted it in the wrong spot.
The third is judging a projector by its box. Contrast ratios on packaging are written by the marketing department. A 4K claim on a listing without a chip specification is a guess. The specs I trust are the ones with a standard attached: ANSI lumens for brightness, native resolution for the panel, and throw ratio for placement.
What I left out, and why
I did not include a mount, a screen, or a soundbar here, and that is deliberate. This is the setup article. If you are starting from zero, the projector comes first, and everything else is chosen around the room you put it in. Buy the screen for the room, not for the projector.
I also did not include a separate streaming stick, because both units here have licensed smart platforms built in. Adding a stick to a projector that already has a real app store is money spent solving a problem you do not have.
The bottom line
The order is the whole trick. Room first, placement second, picture settings third, gear last. Get the sequence right and a 2000 ANSI lumen projector with auto focus and a licensed smart platform will look better in your living room than a far more expensive projector set up badly in the same room.
I have calibrated a lot of projectors, and the ones that impress me are never the ones with the biggest number on the box. They are the ones where somebody took twenty minutes to measure the throw, close the blinds, and set the picture mode correctly. Do that part, and the hardware has a chance to be good.